Tuesday 24 June 2014

Little Details...

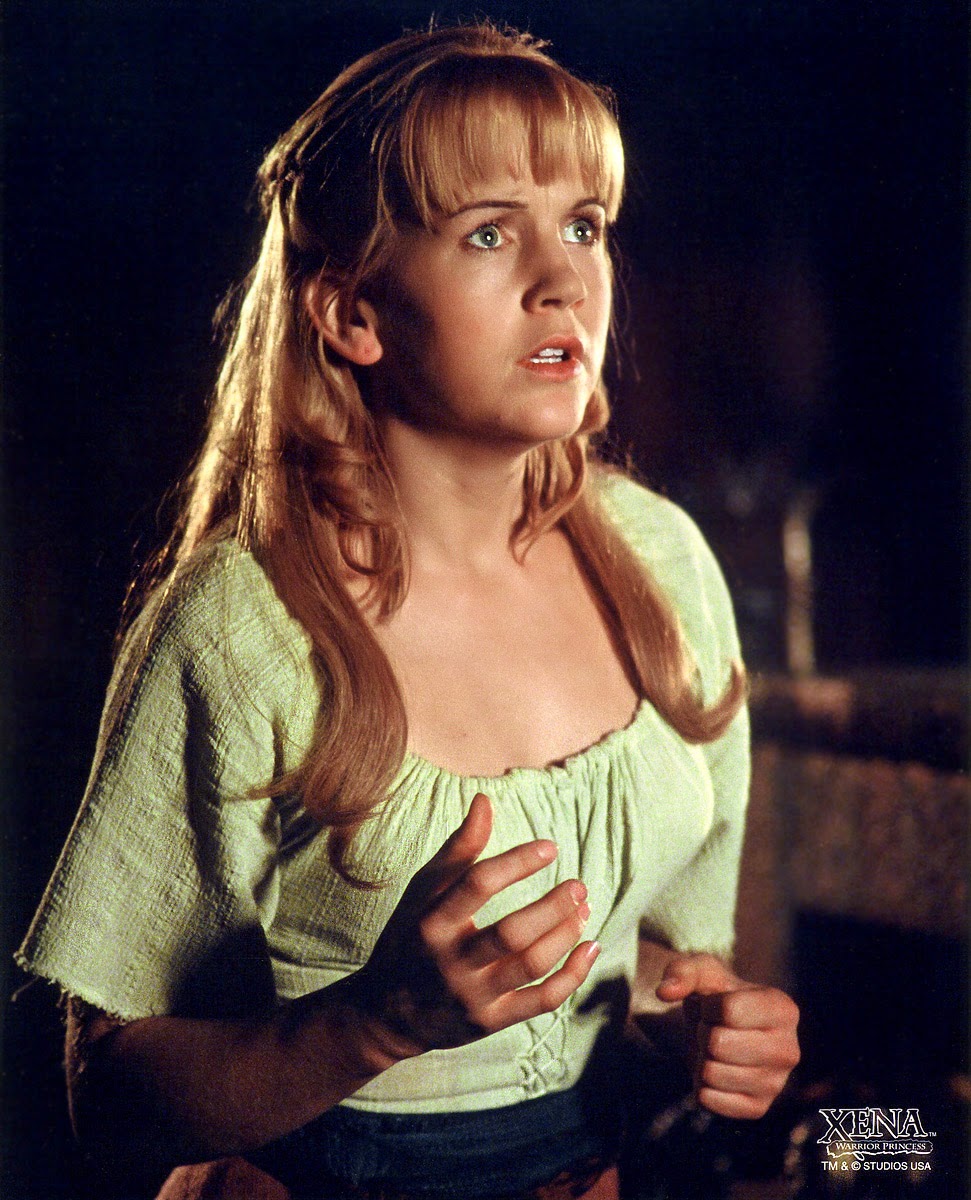
In the run up to my first Peasant Dress Shoot I had been attempting to source some suitable material for the sash around Gabby's waist. Photographs have shown it to be a very loose, open weave, like a sort of hessian sack cloth:


This was proving difficult, but with the bulk of the work done I did the shoot with a temporary sash made out of some blue linen I had lying around. But the search continued for an alternative. I had tried ordering some samples of some blue-coloured hessian fabric but was disappointed with both the colour and the texture. For a start, the only suitable blue was a dark navy which was far too bold, and the samples I received were stiff as card with no flex to them. As such I felt I would be far better off dyeing some old sacking myself.

Courtesy of ebay, I got hold of one half of a used postal sack:


This sack cloth was already way more pliant than the stuff I had tried before, and by the time I was done dyeing and washing it, I expected it would be even moreso.

To get the right shade of blue I ended up having to dye it twice. Dyeing is never an exact science, so when my first lot of Dylon 'Jeans Blue' came out a little too green, I topped it up with 'Oceanic Blue' to brighten it a tad. The end result was, I think, pretty bang on:


I am finding I am growing quite fond of dyeing my own materials for Gab. Not only is it easier to match colours this way but I'm also finding the unique blending of different colours gives the end result a unique not-off-the-peg feel and makes the material look for more natural and 'ancient' than if I had just bought a commercially dyed cloth. The finish is not quite even, not quite so 'perfect' as one would get in a shop.

The completion of the sash means I now have a complete kit for "Cradle of Hope", "Path Not Taken" and "The Titans" and another photo shoot beckons. So I'm thinking I'd quite like to make myself some lovely big 'Titans' scrolls to utilise for a shoot. And maybe do some of Gabby falling on her bum, because I'm a glutton for punishment and silly series 1 Gab is adorable in the extreme! I have already sourced wooden knobs and papyrus parchment paper for scroll-making purposes, so watch this space!


Thursday 19 June 2014

While You Were Editing...

So while I was eagerly awaiting the arrival of my sifted and edited photographs, I decided to kill some time by starting on the green variant peasant blouse. I wasn't originally going to bother but I found some appropriate material for a cheap price at the Fancy Silks Store and decided to buy some in.

The green variant is the same style as the short sleeved blue shirt Gabrielle wears under the striped jacket, only unlike this blue version, it is worn without the jacket, making it a nice piece to have for warmer weather. It shows up in several episodes early in season one, as detailed in my Many Garbs of Gab episodic breakdown. Like the short sleeved blue shirt, this is a crinkled cotton with a gathered neckline and lacing around the waist for shaping.

In light of not being entirely happy with the shape of the sleeves on the first blouse I'd made, it was necessary to adjust the pattern slightly. I had ended up moving the sleeve seam in by a massive six inches in order to reduce the flounce of the sleeves. As I had to construct and gather the sleeves before I found out how big they were, this was a bit of a fiddle and I also couldn't reduce the amount of fabric at the shoulder.

Now I had an idea what I was aiming for from the offset, I could reshape the pattern piece for the sleeve before I started cutting or sewing.

In order to keep the right sort of shape and smooth the shoulders out, I decided to take the six inches from the top centre of the piece. I folded the pattern piece in half lengthways, measured six inches from the fold, and pinned it together at this point. This left the pattern kind of 'pointy' at the shoulder, so when I laid it out I added a bit more of a gentle curve at the top, like the original shape only narrower across the top.

I also shortened the sleeve significantly, measuring from armpit to elbow for an idea of a suitable length, making this distance out on the outer edge of the pattern piece and cutting from one side to the other following the same curve as the existing piece.

The end result was a smaller sleeve piece, less likely to bulge or billow, and hopefully about the right length to reach the crook of my elbow with a little to spare for seams and fraying.


The sleeves attached to the body as per the instructions (thankfully I hadn't had to change any seams or the reshaping would have been more complicated) and I sewed the usual 1/2 inch drawstring channel around the neckline, which was much easier without the additional channels in the sleeves to negotiate. It has to be said, in terms of simplicity, I LOVE this variant and may make another in blue just because it's so simple!


This is the basic shape of the garment, all attached and in one piece:


Nice and simple, yes?

Next, however, comes the slightly annoying and fiddley part:

To make the lacing and loops, I cut the selvedge off the fabric in long strips. A single strip would do for the lacing but I felt something a bit sturdier was needed for the loops. So I ran one through the machine, tripled over on itself, so I got a long strip with three layers of fabric. I cut this into small sections and ended up with a small collection of little ribbon bits. Like so!


These tiny, fiddly bits of cotton now have to be attached and neatly sewn into the front of the shirt in nice straight hidden channels. So I found the centre of the shirt (very important, we do not want wonky lacing!) and measured out from there so that the folded channels would be even. I then had to pin the loops into a fold of fabric so the stitching and ended would be hidden, like so:


Of course the stitching goes on the INSIDE of this top fold, right on the fold line, so I pressed the crease to make it nice and crisp before folding that layer back and re-pin it on the inside before sewing along the crease-line as best I could, and repeating on the other side:


Some of these loops have come out a little smaller than I had hoped - it's hard to tell when there's a layer of fabric covering what you're doing. Not the ones on the left, no - they just look smaller because they're sticking up.

Now for my OTHER piece of selvedge. I popped it through a darning needle and laced up the front, so now we have a nice matching lacing to go with the top! No dyeing required, it's all the same fabric.


Voila! Hopefully I can sort a photo shoot with the new variant soon. My photographer has recently been introduced to Xena and is now coming up with all sorts of ideas, like doing an iconic shot from each episode. I already have some in mind myself, but may have to get cracking on a scroll from 'The Titans' if I want to recreate my favourite shot.

TTFN!

Finished blouse.

Sunday 1 June 2014

We Did It!!

So thrilled to announce that this morning myself and my friend and mentor Jon-Michael successfully crossed the finish line of the 8.5 mile Great Midland Fun Run 2014. (That's 13.5 kilometres to pretty much everyone in the world.) It was an unpleasantly hot day with nary a cloud in the sky, nor the vaguest hint of a breeze, and compared to the torrential downpour of last Saturday, it was not the best weather to be running in.

Mainly due to the heat, I found the distance more of a struggle today. Jon had come equipped with Lucozade and caffeine gels which provided a much-needed boost, but it was undeniably a hard slog. Given the heat I deliberately held back a little on the first couple or three miles, and by halfway I was incredibly glad I did. The absolute saving graces of the day were the cups of water and sodden sponges being handed out by volunteers, and the neighbours who had contributed to the day by rigging up their garden hoses and sprinklers to the shower the route with water, or send their kids out into the street with water pistols. Nothing cools you down or wakes you up better than a cupful of cold water down your back. I was drinking half and then literally emptying the rest over my head!

It goes without saying that the atmosphere of the crowd at an event like this is phenomenal, and the presence of familiar faces like my friend Fiona, and neighbours John, Bridget, Jill and Hannah made all the difference too. The sense of community is amazing. People were sat in their gardens cheering along the main roads, and the local vicar had set the church choir up on the lawn to sing to the crowds while he stood on the churchyard wall to cheer us on. The last mile and half wasn't quite the breeze it was last time, but I still somehow managed to sprint the last 100 yards or so once the finish line was in sight - and what a sight it is after covering that distance in the blazing sun!

Jon and I reckon we came in at about 1 hour 40, my initial target but a little slower than my practice time, but we are still awaiting the official results. We did, however, get our medals!


And the best part of it was, immediately after we had to rush back to the Hilton Metropole to continue the rest of our fundraising as part of the costumed-character entertainments at UK Games Expo. So it has been a busy busy day!

The Just Giving total for Alzheimers Research has come in at £125 for my run, plus £537.68 from our work over the weekend at the Expo.

Suffice to say I am feeling extremely proud of myself. Six months ago I couldn't run for much more than 30 seconds without getting out of breath. To achieve so much in such a short space of time feels amazing. Many many thanks to the people of SE Fitness who spurred me on drastically in the past four weeks and propelled me from 1.8 miles to 5.5 in a single session, and I have to give a shout-out to Jon, too, for all the encouragement and advice he's given. The guy is an inspiration and I can't thank him enough for everything he's done to help me get to this point.


EDIT: I've just found out the temperature was a sunny 20 C with a lazy wind of only 4mph. So we were, for the most part, literally running faster than the wind!